- Dr.Tuba
- Tips & Tricks
- 0 likes
- 913 views

Strut nose damage on wings often starts from one small detail, the locking line on the strut bladder nose. A short check before every session protects the bladder and reduces repair risk.
Every wing strut bladder includes one or two small fabric tabs at the nose. A short line connects to those tabs and then passes through a small hole in the strut nose fabric. This line supports bladder re-insertion and also holds the bladder nose in position during riding.
Typical problems with the locking line
1. Locking line not used
The line hangs free or stays inside the strut. During inflation or crashes the bladder moves toward the nose area. TPU presses into stitching and fabric edges, which often leads to bursts in the nose zone.
2. Locking line pulled too far
The line passes through the hole with too much tension. The bladder nose sits partly outside the fabric tunnel. Exposed TPU rubs on the fabric edge and bursts start exactly where fabric meets TPU.
Correct setup of the locking line
- The line connects to both locking tabs on the bladder nose.
- The line exits through the small hole in the strut nose panel.
- Light tension holds the bladder nose inside the strut tunnel.
- No TPU appears outside the fabric.
- The nose zone feels smooth and centered, with no folds or twists.
Many kites use a similar concept on a smaller scale, but usually only one locking tab near the upper nose edge of the strut bladder.
Examples of wrong and correct setup
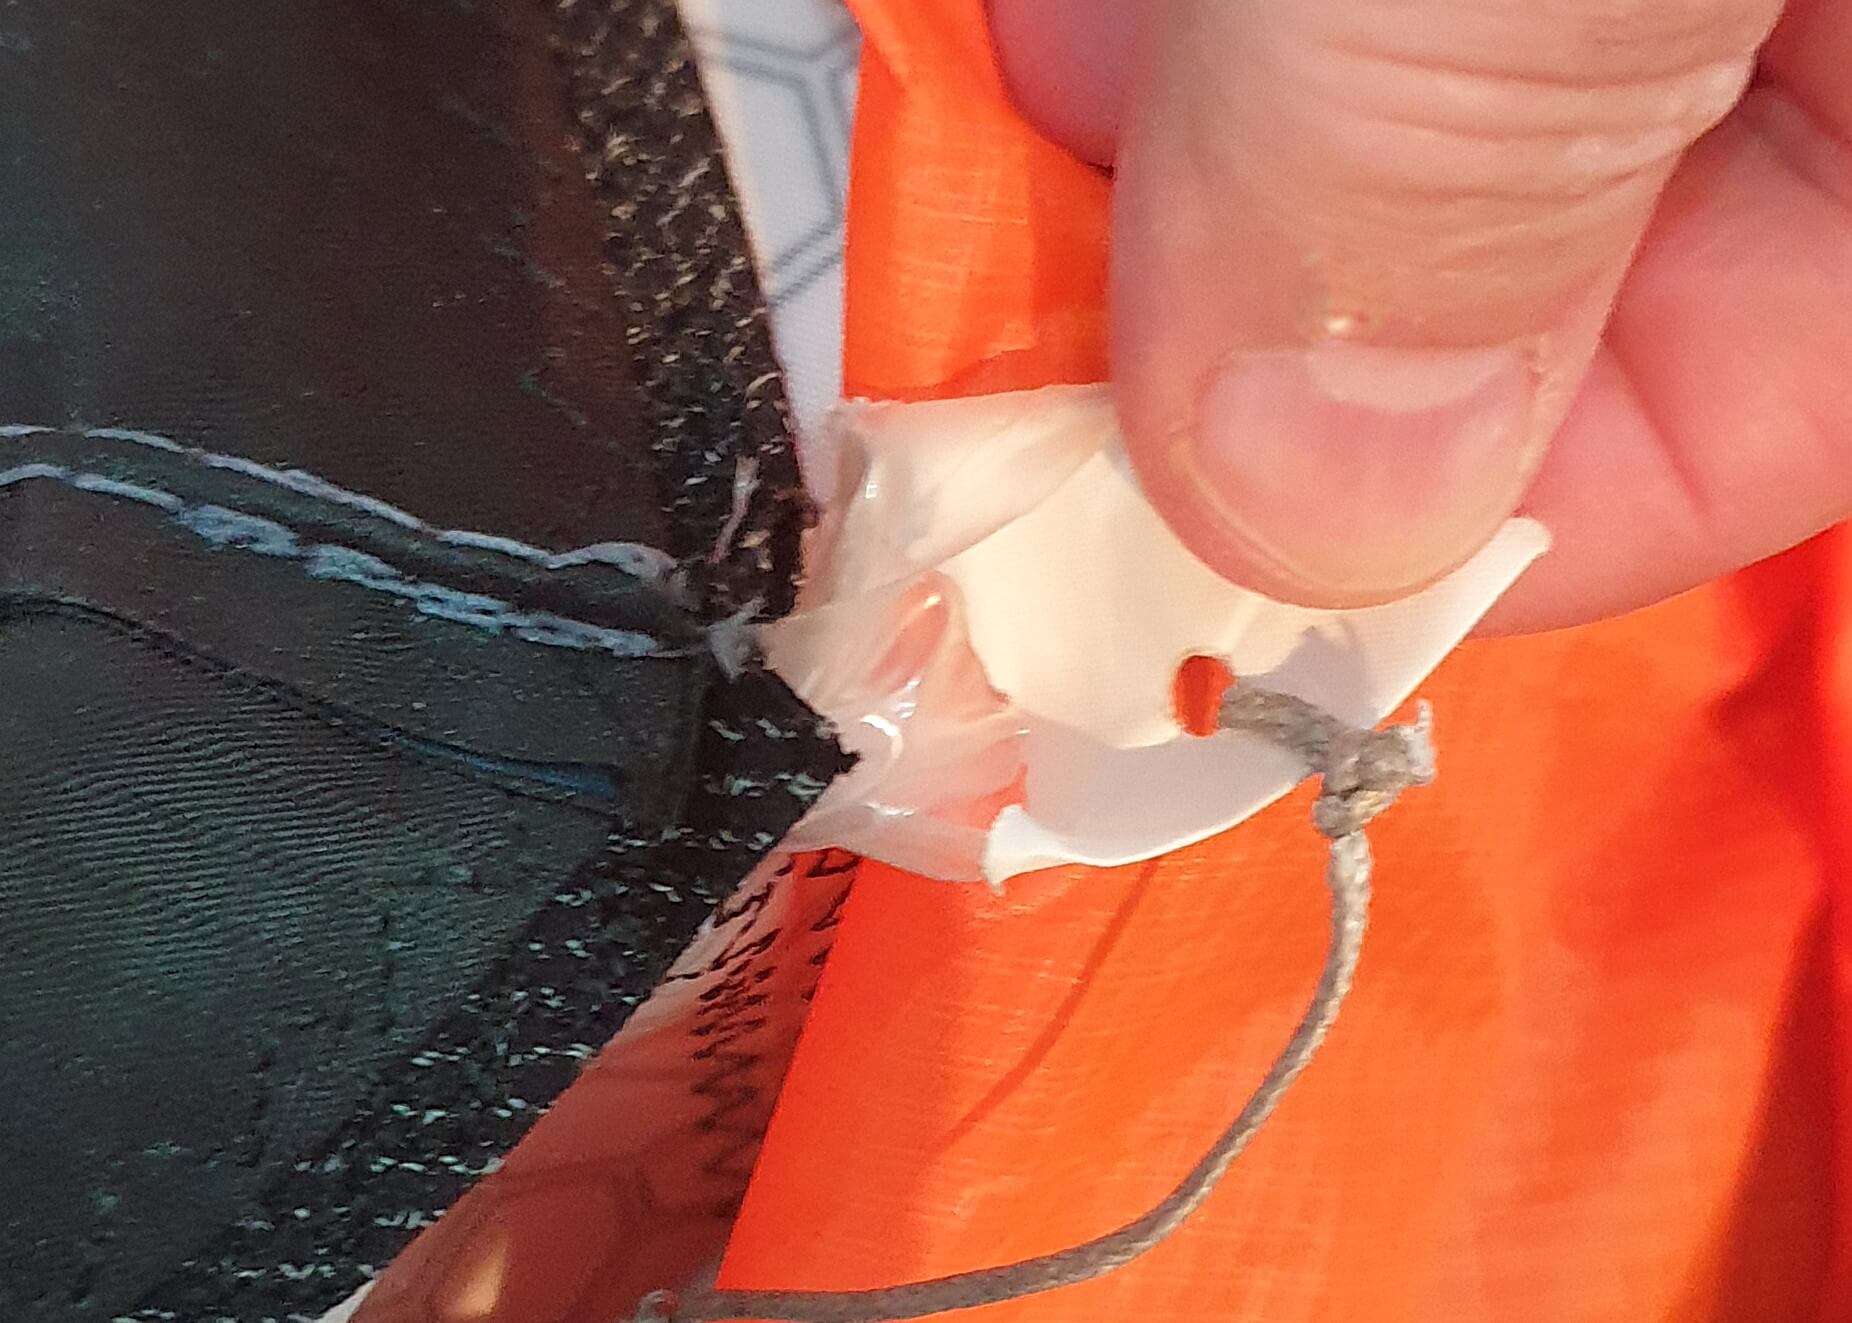
Wrong setup, bladder nose pushed outside the fabric, exposed TPU at the fabric edge. Unfortunately this brand also does not add locking anchor point for the line.

Correct setup, bladder nose seated inside the fabric tunnel, locking line through the nose hole with light tension, no TPU visible from outside.
Use these examples as a quick reference during every bladder installation and before each ride. Correct locking line setup holds the bladder nose in a safe position and greatly reduces the chance of nose bursts.
Frequently Asked Questions
Why do strut bladder noses burst so often?
There are several reasons possible, wrong installation (twists), moisture etc... but for sake of this article we'll focus only on nose lines. Bursts near the nose may come from incorrect use of the locking line. Either the line stays unused, or tension pulls the bladder nose toward the seam, so TPU works directly against stitching under pressure; or twist is forcing bladde to push inward the structure. In most of such cases bladder may burst.
How tight should the locking line be on a wing strut bladder?
Use light tension, enough to hold the bladder nose inside the fabric tunnel, without pulling TPU toward the hole. Most of brands are using also locking points to secure line in place.
Do all wings have two locking points on the strut bladder? What about kites?
Many wings feature one or two locking points. Some designs place only one point on the upper side of the strut bladder nose. On kites we see increased usage of one locking point, but mostly still dependant from which factory produced the kite.
Is riding safe without using the strut bladder locking line?
Riding without the line increases risk. The bladder nose is not locked and can move during inflation which may represent risk.
Is nose damage from wrong locking line setup covered by warranty?
Damage from incorrect locking line setup usually falls under installation error. Correct use of the line greatly reduces stress on the bladder nose and supports longer service life.